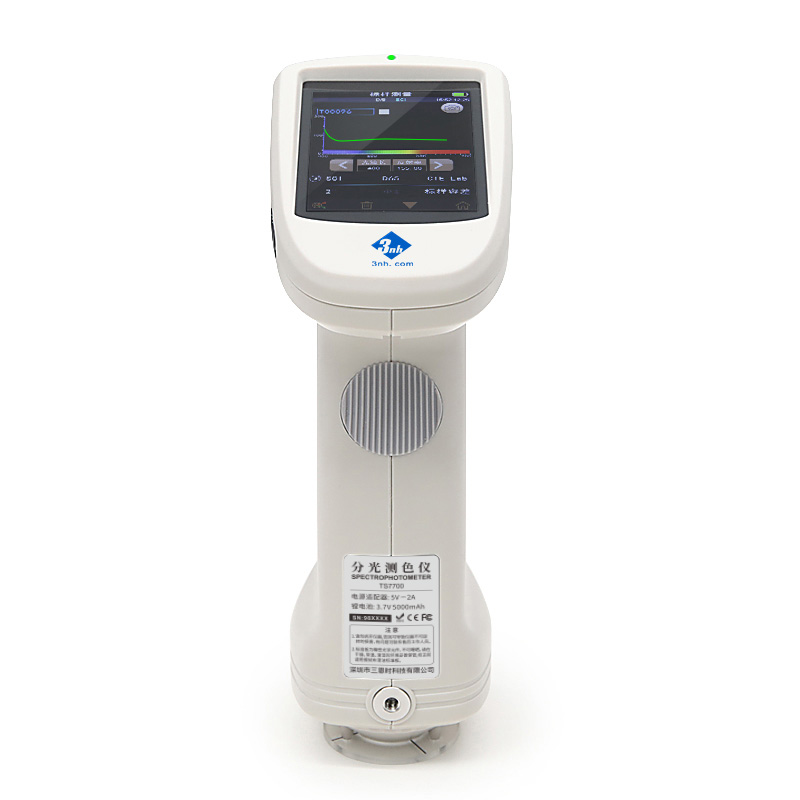
MS3012 Multi-angle spectrophotometer adopts Industrial-grade MCU with 12 measuring angles, which can provide accurate and consistent color measurement for metalllics, pearlescents and other complex special effect finished products. The smooth operating system and superior performance of the optical system allow the MS3012 multi-angle spectrometer to provide repeatability and reproducibility of Sparkle Grade(SG),Diffuse coarseness(DC) and Color Variation(CV) measurement.
3nh Multi-angle spectrophotometer MS3012 is used to measure the color difference for the surface paint which is affected by different viewing angles and viewing conditions. It can not only measure multi-angle color difference, but also measure and characterize special finishes through 12 measuring angles. Even in the curved surface, it also has high measuring accuracy and stability.
Technical characteristics
1. Multi-angle measurement
Adopt 7 illumination sources, 2 receivers to measure 12 measurement angles at the same time

2. More intuitive display
Touch screen can display all Angle measurement results, more intuitive view of the comprehensive data.

3. Effect measurement discrimination function
Quickly distinguish the sample Sparkle Grade(SG),Diffuse coarseness(DC) and Color Variation(CV), simple and effective quality inspection.

4. 256 Image Element Double Array CMOS Image Sensor
The higher optical resolution ensures the measuring speed, accuracy, stability and consistency of the instrument. The core technology makes it as the same platform with international standards and complete compatibility.

5. Adopt Full spectrum LED light source with blue enhancement
The Full spectrum LED light source with blue enhancement ensures sufficient spectral distribution in the visible light range, avoids the spectral loss of LED in a specific band, and ensures the accuracy of instrument measurement results and low cost maintenance.

6. Concave grating spectrophotometric technology
Using concave grating spectrophotometric technology, with higher resolution, makes color measurement more accurate.

7. Professional-grade white board
Professional-grade white board, high hardness in the surface, stable optical performance

8. Higher quality
Industrial grade real-time processing MCU, Bluetooth 5.0 transferring more stable and reliable.

9. Ergonomics Novel and fashionable appearance design
The instrument appearance design is easy to operate, and the hand holding position and the measurement button are well-designed, which can meet different holding habits, smooth and fine surface, from the high-precision appearance treatment process.

10. Color camera preview, can clearly observe the measured area
Built-in color camera positioning, can accurately judge the object measured position, and improve the measurement efficiency and accuracy.

11. Multiple color measurement space, multiple observation light sources
Offer CIE LAB,XYZ,Yxy,LCh,β XY,DIN Lab99 color space, And D65, A, C, D50, D55, D75, F1, F2 (CWF), F3, F4 and F5, F6 and F7 (DLF), F8, F9, F10 (TPL5), and F11 (TL84), F12 (TL83/ U30) A variety of light source, which can meet the special measurement demand under different measurement conditions.

12. Easily analyze data
The screen can intuitively display spectrum/data, sample chromaticity value, color difference value/figure, pass/fail results, color simulation, sample effect value, effect difference value and other data, convenient to view while also greatly improve the user's work efficiency.

Technical parameters
| Model | MS3012 |
| Measurement Geometry | 12 measurement angles (7 illumination sources, 2 receivers) |
| Measure Angle |
45° Receiver: 45as-15°,45as15°,45as25°,45as45°,45as75°,45as110° 15°Receiver: 15as-45°,15as-15°,15as15°,15as-30°,15as45°,15as80° Conform to the standards:ASTM D 2244,E 308,E 1164,E 2194, E2539,DIN 5033,5036,6174,6175-1,6175-2;ISO 7724, 11664-4 SAE J 1545 |
| Application | Provide accurate and consistent color measurement for metallic, pearlescent and other complex special effect color products |
| Light Source | Full spectrum LED light source with blue enhancement |
| Lamp Life | 5 years, 3 million times measurements |
| Spectrophotometric Mode | Concave Grating |
| Sensor | 256 Image Element Double Array CMOS Image Sensor |
| Wavelength Range | 400nm-700nm |
| Wavelength Interval | 10nm |
| Measurement Range | 0~600% |
| Semiband Width | 10nm |
| Measuring Aperture | Illumination size Φ23mm / Measuring spot 9X12mm (Customized: Illumination size Φ10mm / Measuring spot 6X8mm) |
| Color Space | CIE LAB,XYZ,Yxy,LCh,βxy,DIN Lab99 |
| Color Difference Formula | ΔE*ab,ΔE*94,ΔE*cmc(2:1),ΔE*cmc(1:1),ΔE*00, DINΔE99,ΔE DIN6175 |
| Other Colorimetric Index | Flop Index, Int-Em |
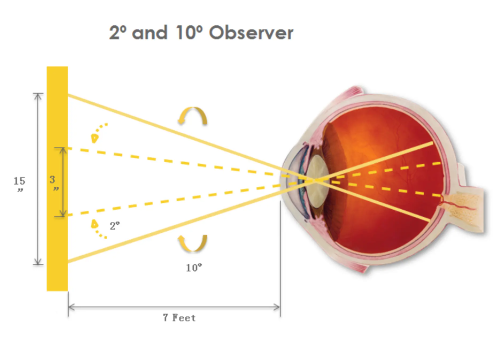
| Observer Angle | 2°/10° |
| Illuminant | D65,A,C,D50,D55,D75, F1,F2(CWF),F3,F4,F5, F6,F7(DLF),F8 ,F9,F10(TPL5),F11(TL84),F12(TL83/U30) |
| Display | Spectrogram/Values, Samples Chromaticity Values, Color Difference Values/Graph, PASS/FAIL Result, Color Offset, Color simulation, Sample effect value, Effect difference value |
| Measuring Time |
Approx. 1 second for one angle Approx. 12 seconds for all angles |
| Repeatability |
Spectral reflectance: Standard deviation within 0.08% Chromaticity value: ΔE*ab 0.02 ( When a white calibration plate is measured 30 times at 5 second intervals after white calibration) |
| Reproducibility |
ΔE*<0.10,avg on the gray tile of BCRA tile set ΔE*<0.25,avg on the color BCRA tile set |
| Inter-instrument Error | 0.18ΔE*00(avg on reference Series II BCRA tile set) |
| Effect Parameters | Sparkle Grade(SG),Diffuse coarseness(DC) and Color Variation(CV) |
| Effect Measurement |
6 angles Sparkle Grade(SG),Color Variation(CV):15as-45°,15as-30°,15as-15°,15as15°,15as45°,15as80° 15d Diffuse coarseness(DC) |
| Effect Repeatability |
Sparkle Grade(SG) Short-term repeatability: 0.12% (10 times standard deviations) (When a color plate is measured 10 times at 10 second intervals after white calibration) Diffuse coarseness(DC) Short-term repeatability:e0.09% (10 times standard deviations) (When a color plate is measured 10 times at 10 second intervals after white calibration) |
| Effect Reproducibility |
Sparkle Grade(SG) Reproducibility: 1.9% (10 times standard deviations) (avg on reference Series II BCRA tile set) Diffuse coarseness(DC) Reproducibility: 1.4% (10 times standard deviations)(avg on reference Series II BCRA tile set) |
| Trigger mode | Pressure sensing trigger, button trigger, software trigger |
| Measuring Mode | Single measurement, average measurement (1-99), continuous measurement (1-99) |
| Locating Mode | Color camera preview |
| Dimension | L*W*H=195X83X128mm |
| Weight | About 1Kg |
| Power | lithium-ion battery, 3.7V,5000mAh, Continuous test 6000 times within 8 hours of full charge |
| Display | 3.5-inch TFT color LCD, Capacitive Touch Screen |
| Interface | USB, Bluetooth 5.0 |
| Data Storage | 1000 pcs Standards,4000 pcs Samples |
| Language | Simplified Chinese, Traditional Chinese, English |
| Operating Environment | 10℃ to 50℃, humidity does not exceed 85%, no condensation |
| Storage Environment | -20℃ to 50℃, humidity does not exceed 85%, no condensation |
| Calibration | Built-in white board parameters, external white board,black cavity |
| Calibration Interval | 4 hours,8 hours,24 hours,Startup calibration |
| Standard accessories | Power Adapter, USB Cable, User Guide,PC Software(download from the official website), Calibration Board, black light trap,Protective cap, wristband |
| Optional Accessory | Micro-printer |
| Notes | Technical parameters are for reference only, subject to actual sales products. |


 0086 18165740359


.jpg)

.jpg)
.jpg)
.jpg)

 Skype Online